
HOW TO CREATE BOKEH BACKGROUND BLUR TO A PHOTO IN PHOTOSHOP
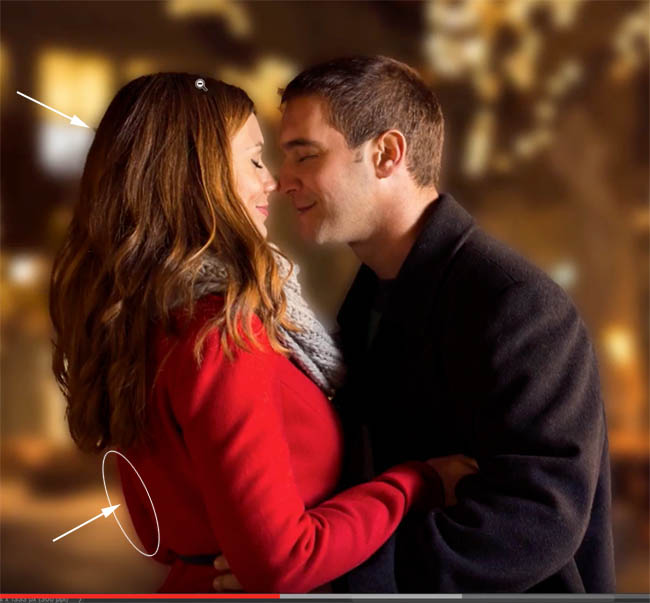
1. CUTTING OUT THE SUBJECT
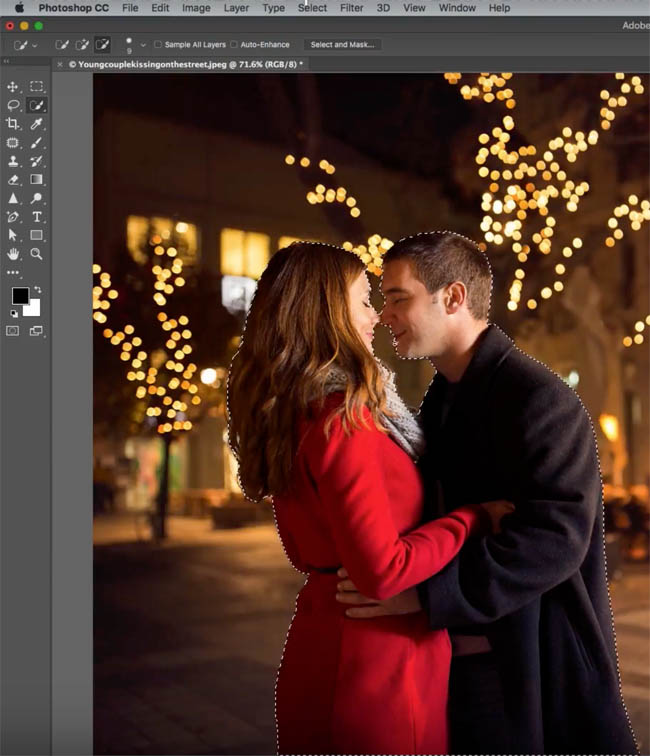
Why don’t we start off by just cutting them out quickly with the Quick Select Tool. Grab that Quick Select Tool and move it over the areas you need to select. Hold the Alt key or the Option key to remove from the selection.
2.
It’s looking pretty good, but I just want to check my selection. Hit the Q for Quick Mask, to view in Quick mask. You are checking for areas left out. It’s looking not bad at all. Press Q to exit quickmask.

3.
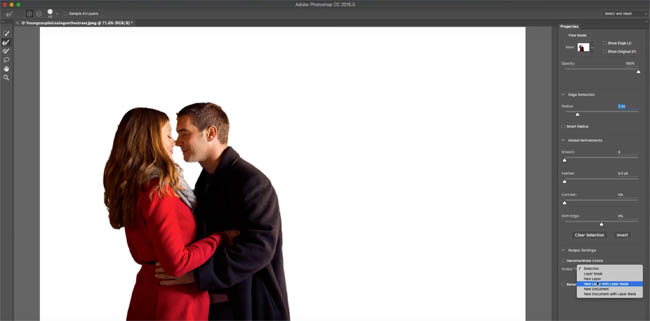
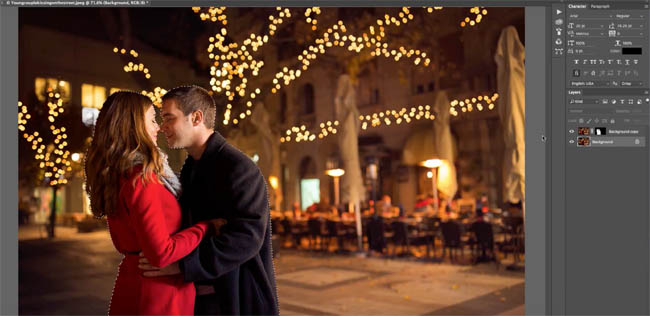
Choose the Select and Mask right now, and I’ll give it a little bit of radiance just to make it look better, and clean it up a little bit. We’re going to choose the new layer with a layer mask option.
4.
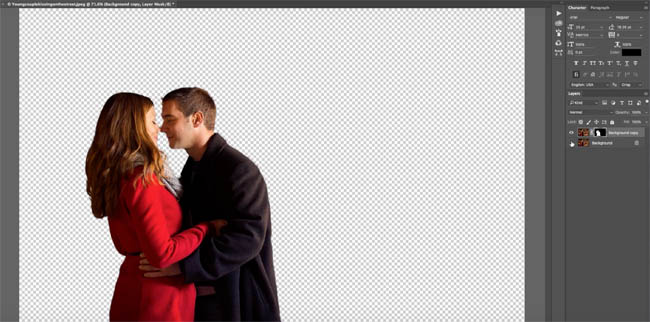
We’ve got them cut out
5.
Hide the top layer and select the bottom to see this as the background. So here’s the thing that happens; When people do a simple blurring of the background like this, notice this fringing we get around the edges there? You can see it’s almost like a halo effect or a doubling effect there. Hit the Cancel right there and let me show you a better way.
6. PREPPING THE BACKGROUND
Here’s how we can do to eliminate this problem. With the background still as the active layer, Ctrl click on the layer mask to make a selection.
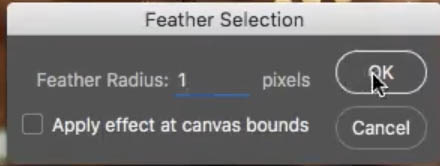
7.
Choose Select, Modify, and expand this by 1 pixel, and then, choose Select, Modify, and feather it by 1 pixel. This is just creating a softer edge than just that hard edge.
8.
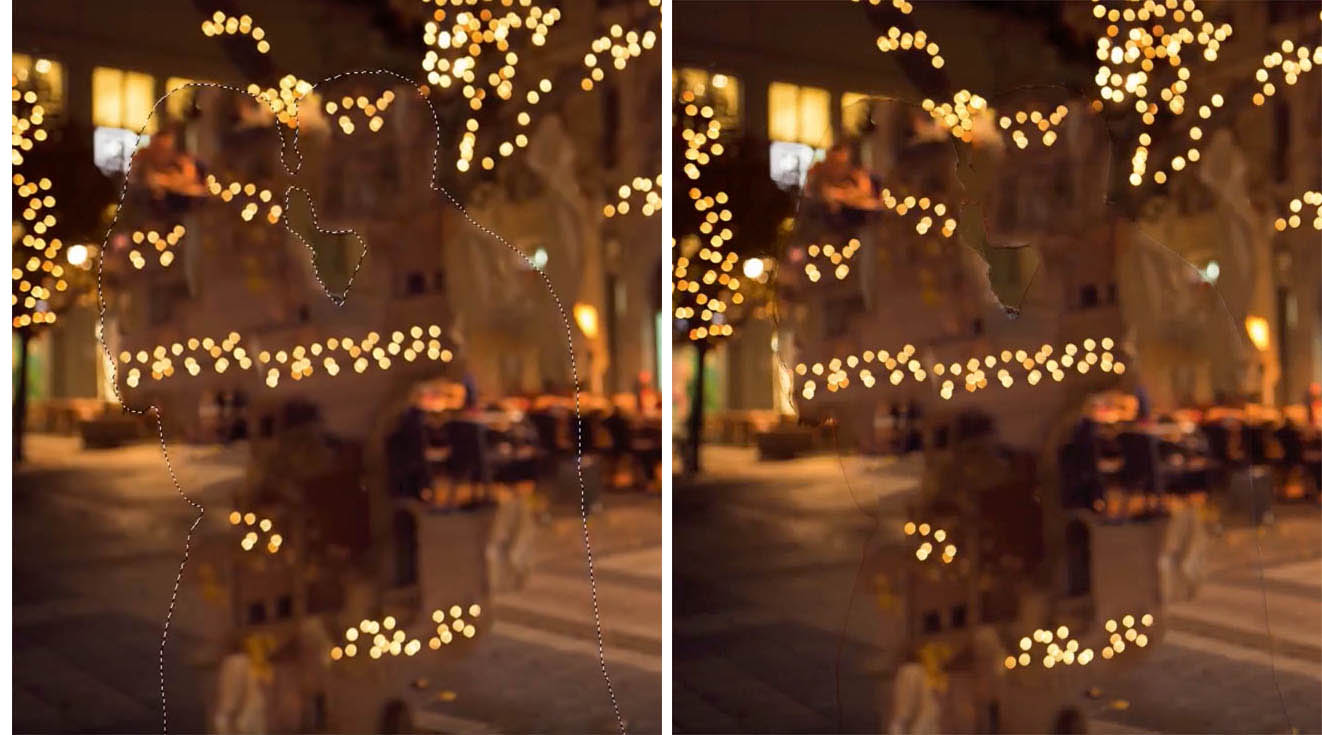
Use Content Aware Fill. Hide the top layer so you can see what we are doing.
Press Shift + Delete on Mac, (Shift + Backspace on Windows), to bring up the Fill dialog box. Make sure you select Content Aware, and then, just click okay. You can see we got this kind of ghosting effect, but that’s all we need to make sure we don’t get those colors bleeding around the edges when we blur it later on.

9.
Turn the top layer back on. We’re almost there.

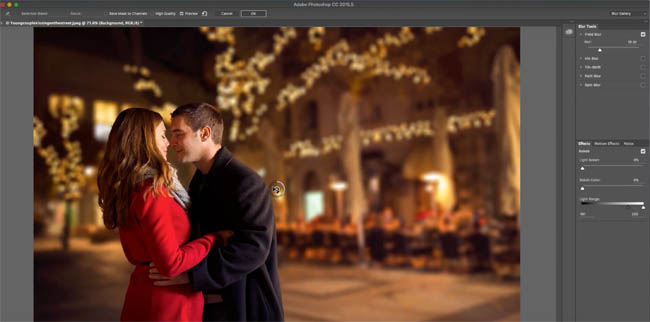
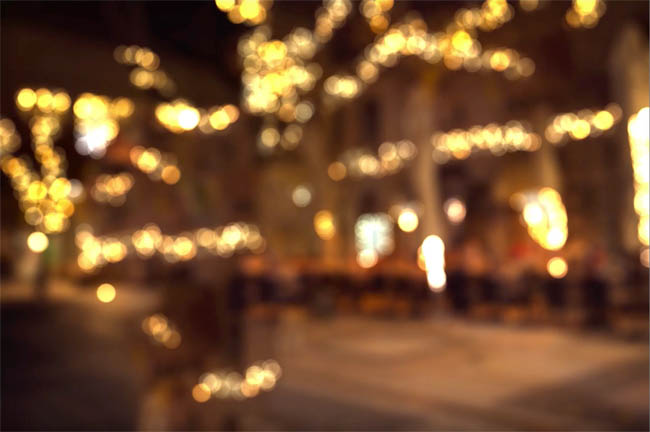
10. MAKING THE BOKEH BLUR
Now, we want to create a soft blurred background, but we want to really enhance this bokeh in the background that comes from the lens, and that gives it that really nice romantic look. And that also makes it look like it was shot with a much more expensive lens.
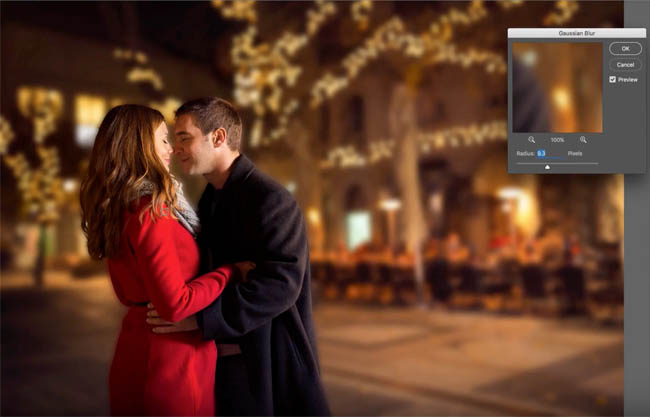
So let’s make sure the background is selected, then we’re going to choose Filter>Blur Gallery>Field Blur
We’re doing this here inside of Photoshop CC/CS6. Now, the Blur Gallery was added in Photoshop CS6, (if you have an earlier version, just use the Blur>lens Blur, and you’re going to get a similar result.)
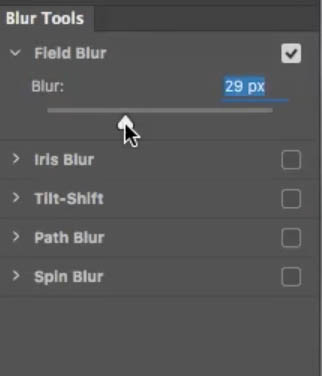
The Field Blur, is where we create a depth of field effect by applying two points normally. We’re just going to keep this single point create a blur. Right now, we’re at about a 15 blur and we really want to bring this effect out. It takes a little bit of experimentation to get it just right.
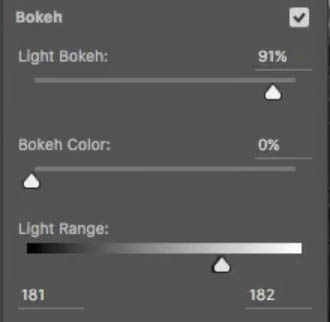
11.
Start with Light Bokeh and we’re just going to move it up a little bit until we start to see some of that bokeh effect. Okay, it’s starting to happen, but it’s not very clean yet.
Play around with the Light Range. We’re going to actually clamp it down, and so we bring the white triangle in. Bring the black a bit more and, have these almost on top of each other to get the effect we’re looking for.
12.
Let’s increase the blur; there we go, and notice, this changes the size of the round disks.
This is just really a balancing act of just playing around with the Light Bokeh, Light Range and Blur.
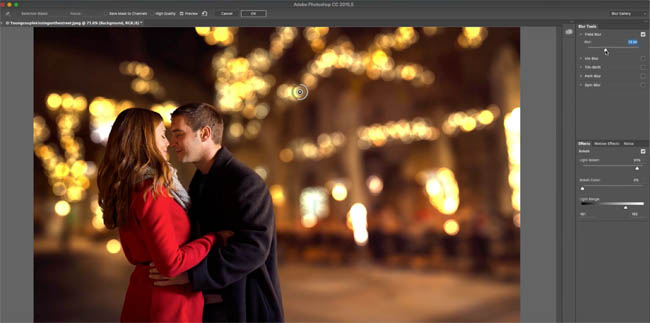
If we hide the top layer for a second and look at our background, notice it’s beautiful and seamless because we used that Content Aware Fill, there’s no fringing or anything around there, and so we’ve been able to create that effect just like that.
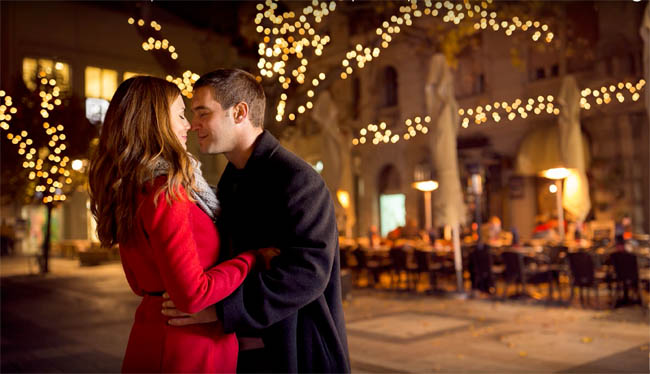
So if we’ll look at it before and after, you can see how much more dreamy and romantic this photograph is.


You May Also Like

SET CAMERA RAW TO NIGHT, THEN LIGHT IMAGES IN PHOTOSHOP.

SKY REPLACEMENT IN PHOTOSHOP, ULTIMATE TUTORIAL – FREE SKY IMAGES INCLUDED.
