
HOW TO CREATE A REALISTIC BEAM OF SUNLIGHT IN PHOTOSHOP

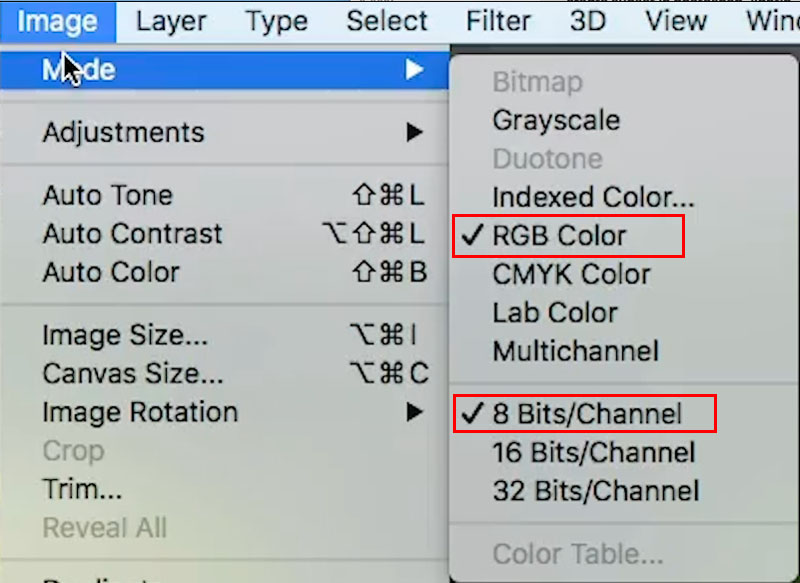
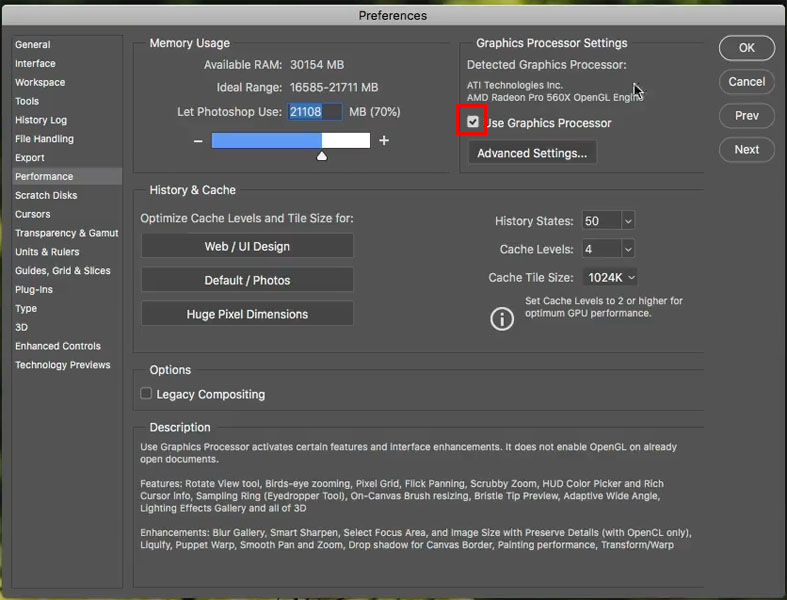
1
Image>Mode
Make sure you are in 8-bit RGB mode.
Also go to Preferences>Performance and make sure Use Graphics Processor is turned on (It should be on by default).
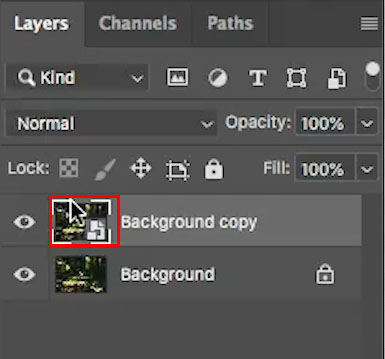
2.
Right click on the layer name and choose Convert to Smart Object. This is optional, but will give you more flexibility if you want to change it later.
3
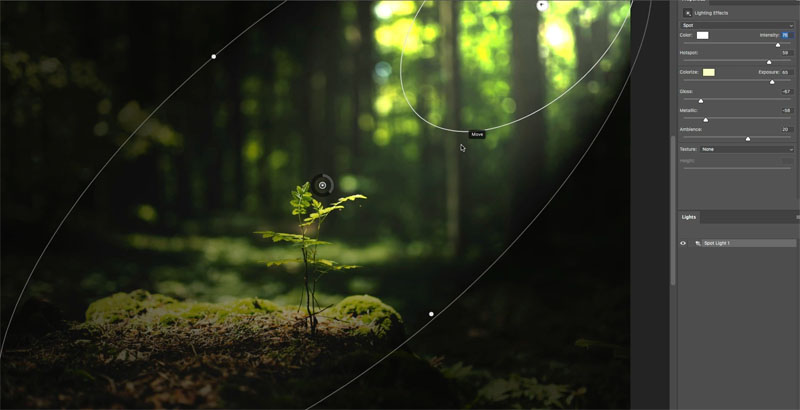
Choose Filter>Render Lighting Effects
From the presets, choose 2 o’clock Spotlight

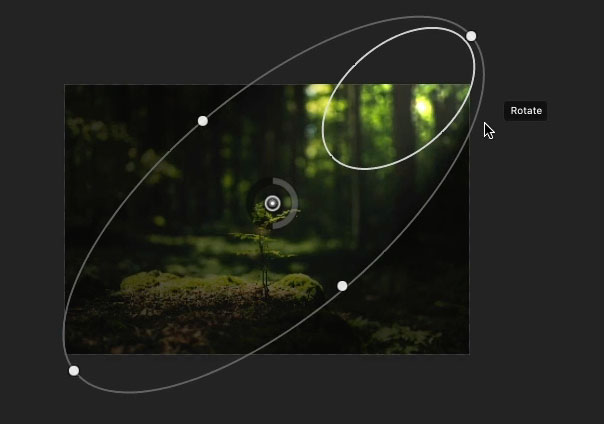
4.
Zoom out. Drag the dots to resize the ellipses
Drag inside the ellipses to move the light
drag outside the ellipses to rotate the light.
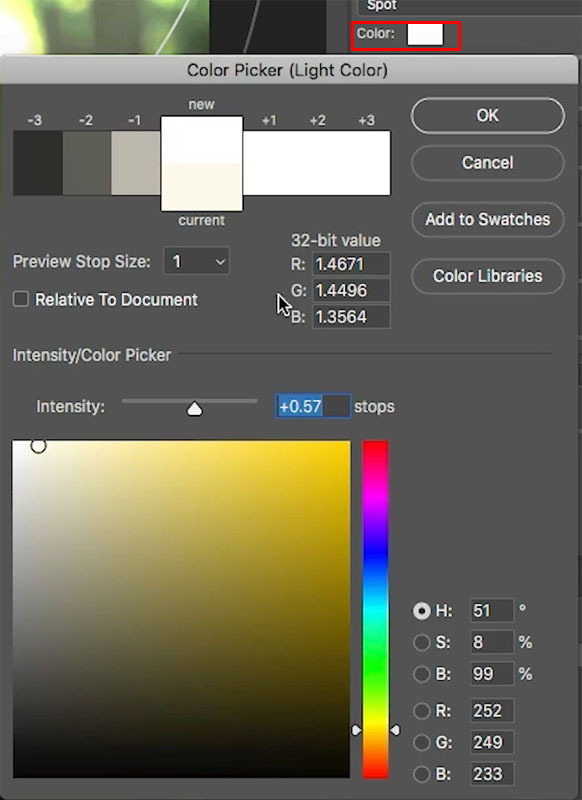
5.
Click on color
Increase the Intensity to .57 This enables us to adjust the overall intensity more.
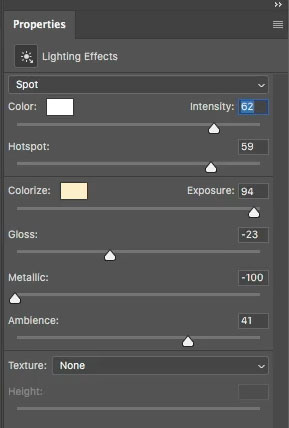
6.
Make the adjustments as shown here (also on the video you can see easier).
7. ADDING DREAMY SUNLIGHT
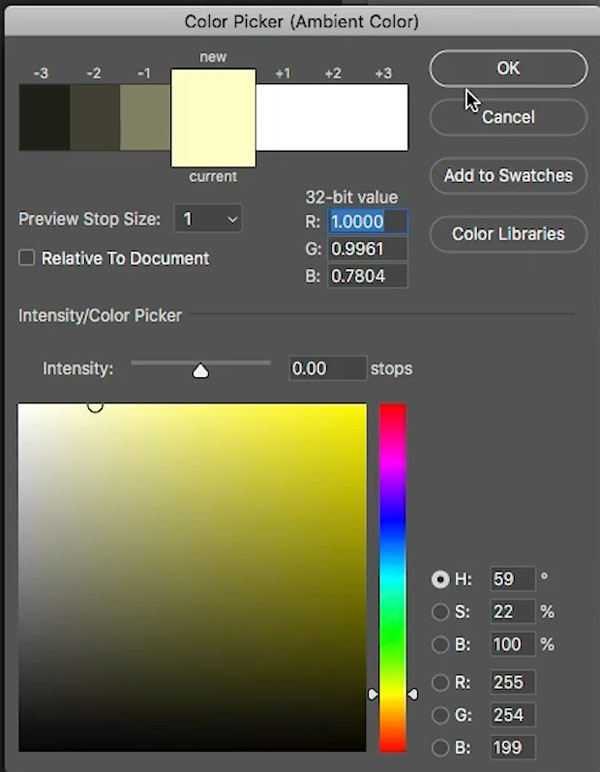
Click on colorize
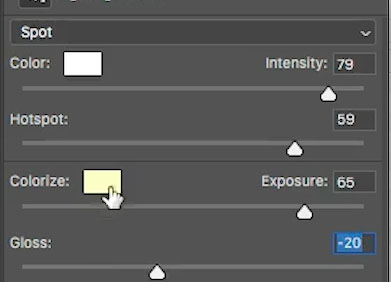
Choose a warm yellow/orange color
8
Adjust intensity for the new color.
Reduce the metallic all the way down.
Adjust the gloss to get that dreamy haze, a higher number dials up the dreaminess. 🙂

Click ok to apply and we have a much more romantic looking image. We aren’t done yet, 1 final touch. We are going to add some pollen to sell the effect.
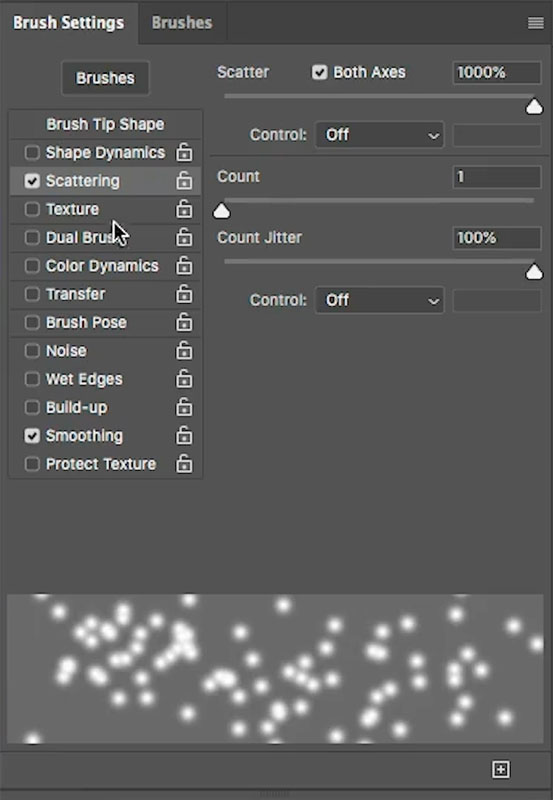
9. MAKING A POLLEN / FAERIE DUST BRUSH.
Click on brushes in the tool box (B key)
At the top of the screen choose a soft round brush and set it to 0% hardness and 11 px.

10.
Go to the Brush settings panel (Window>Brush Settings)
Choose scattering.
Click on both Axes and turn the Scatter all the way up
Count jitter 100%
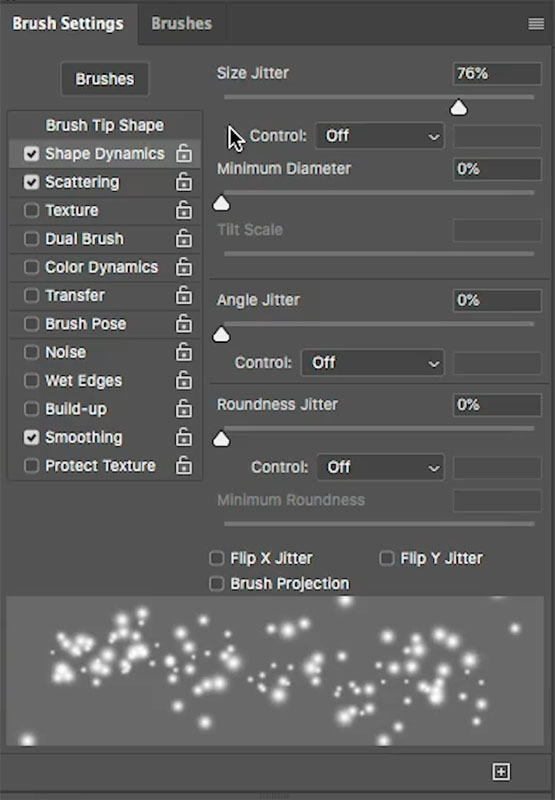
11
Shape Dynamics
Size jitter 76% or higher
12
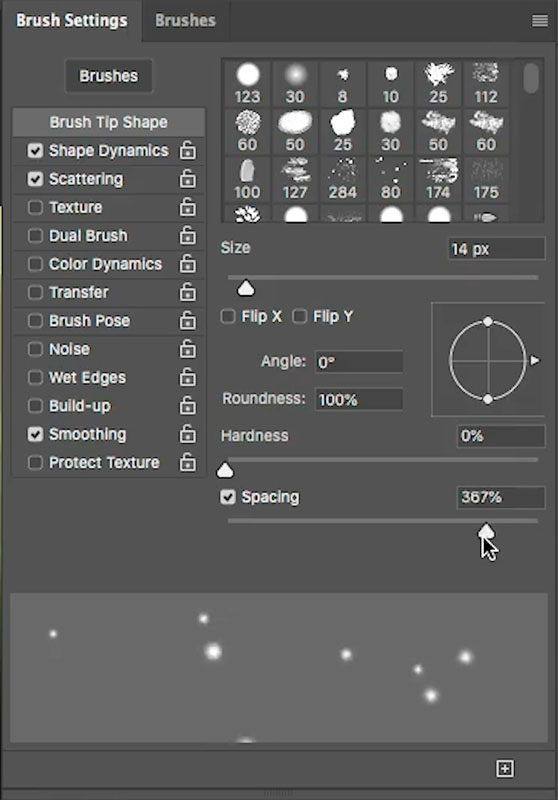
Choose Brush Tip shape
Turn up the spacing quite high. I used 367% here
13
Create a new layer
Choose White as the foreground color
Paint in a few particles, See how they look like pollen.
You could stop here, or try the next step to enhance them.
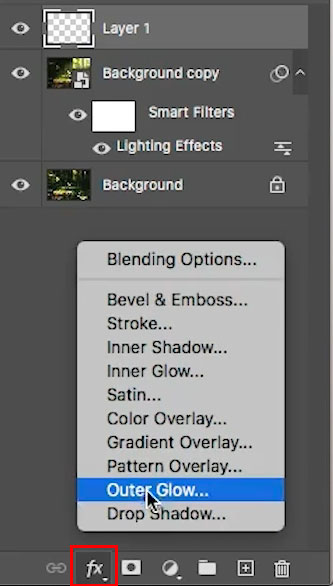
14
Choose fx and select Outer Glow
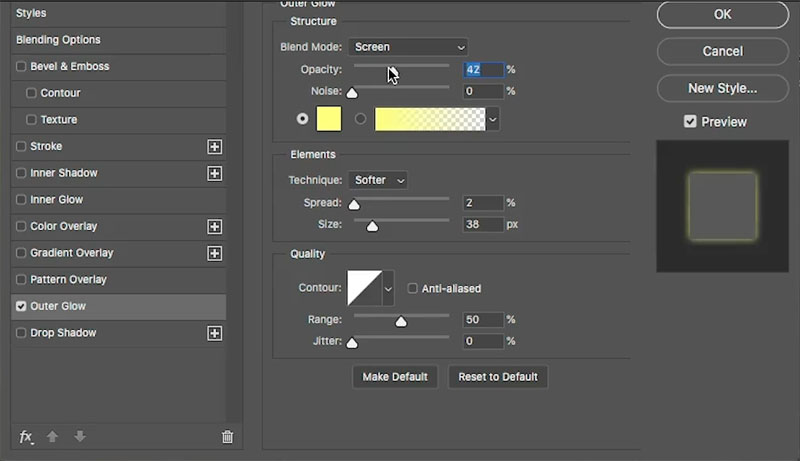
15
Choose similar settings to what is shown here. This gives them a slight magical glow.
For fantasy work, choose a different color for the glow.
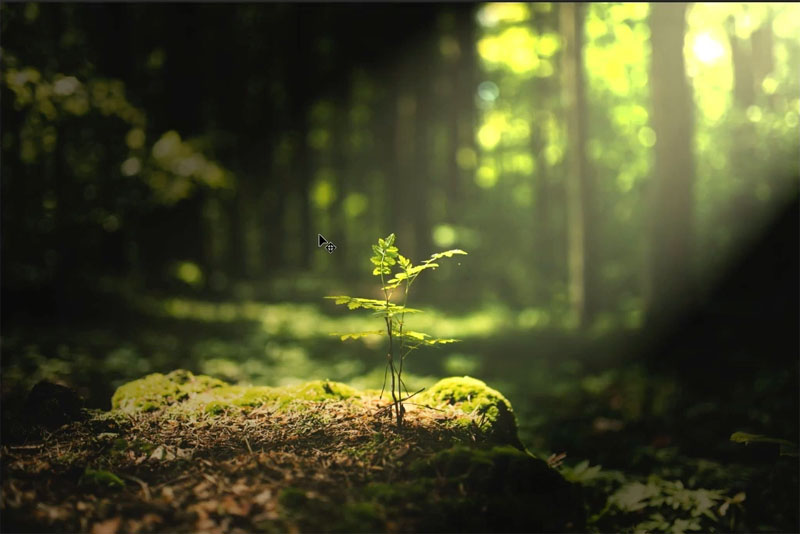
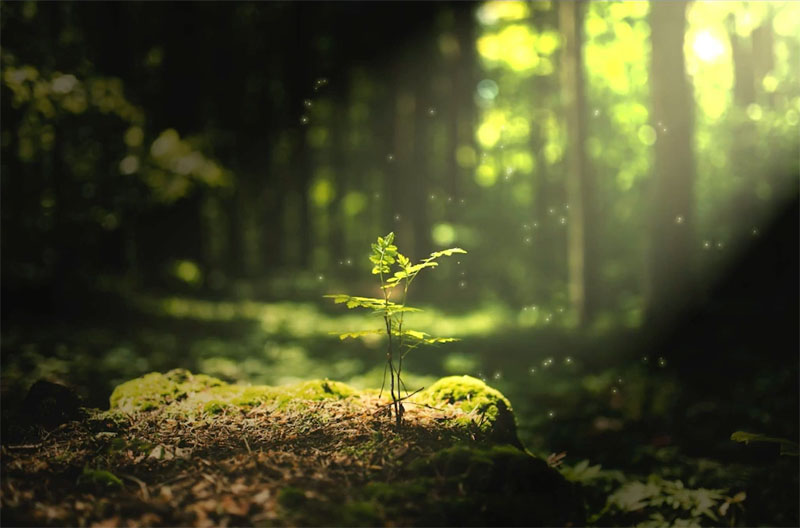
And here is our final, may I say, a bit more interesting than the original?

You May Also Like

HOW TO TURN ANY PHOTO INTO A FACEBOOK 3D PHOTO IN PHOTOSHOP

HOW TO ADD A TEXTURE TO A FACE IN PHOTOSHOP, DISPLACEMENT MAPPING AND WRAPPING TEXTURES
