
HOW TO COLOR GRADE PHOTOS IN 1-CLICK WITH GRADIENT MAPS IN PHOTOSHOP

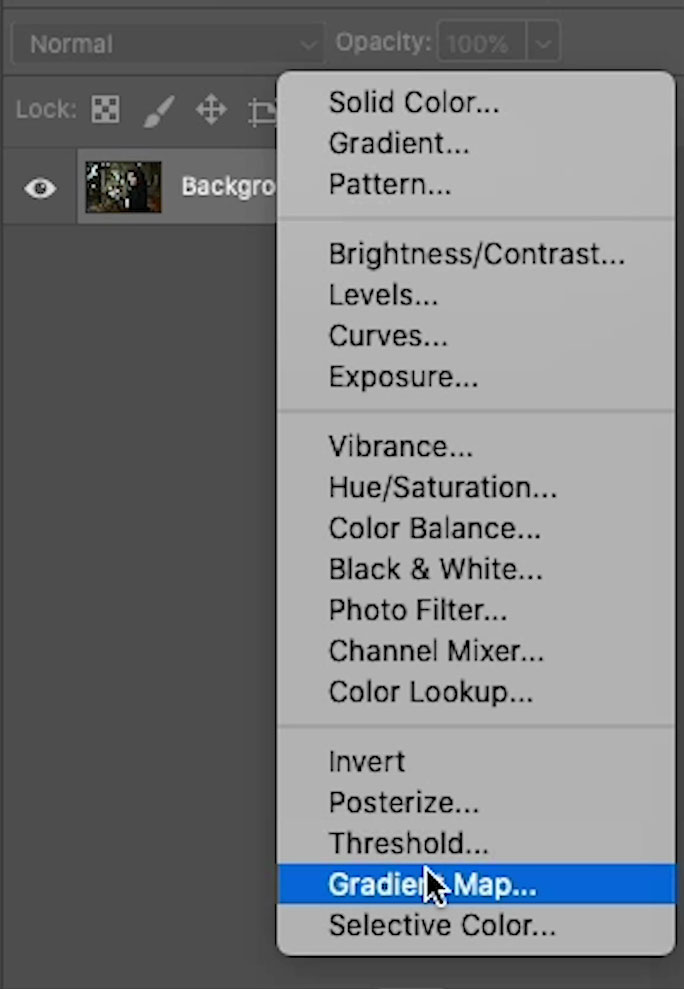
Click on adjustment Layers in the Layers Panel
Choose Gradient Map
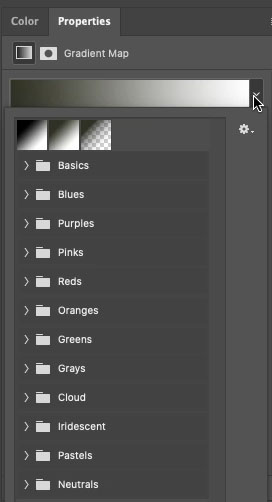
The Properties panel will show the last used Gradient active
You can see how it effects the photo right away.

HOW A GRADIENT MAP WORKS
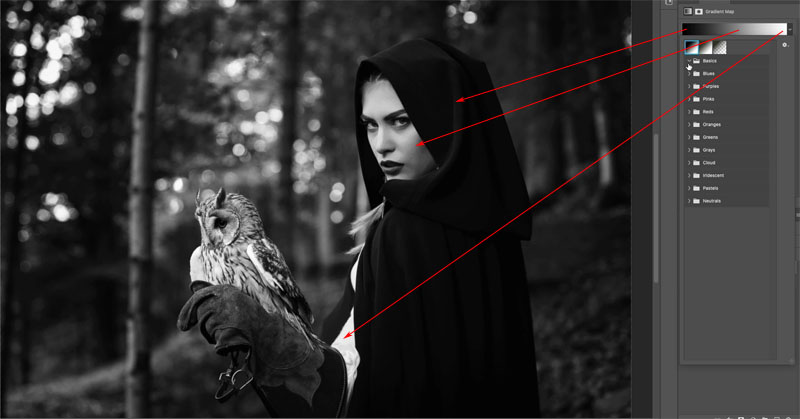
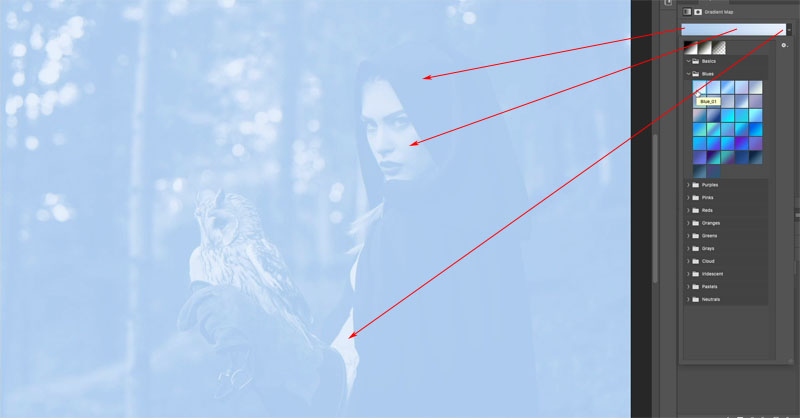
The gradient map maps the colors of the gradient to the tones of the image.
The colors on the left of the gradient are mapped to shadows, the colors on the right are mapped to highlights.
Here we can see the results of a blue to white gradient.
MAKING THE GRADIENT MAP LOOK GOOD
So far, we have changed the color of the image, but we want to blend it with the original colors to get a more color graded look.
In the Layers panel choose the Gradient Map layer.
Change the blending mode from Normal to color.
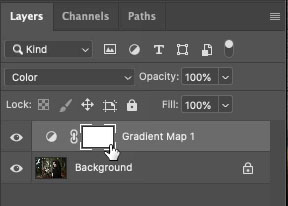
And now the tones are preserved and only the color changes. Look at this beautiful rich blur tint.

To move into a more cinematic color grade, lower the opacity of the color layer, so it blends with the original color.
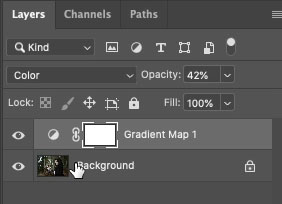
Look at this color, it’s ready for TV or the movies, and it was easy.
Recapping the 3 moves.
- Add Gradient Map
- Change to Color Blend <Mode
- Adjust the opacity.
Now, read on and find out how you can unlock hundreds of gradients that are in Photoshop already, but hidden.

UNLOCKING HIDDEN TREASURE IN PHOTOSHOP
Open the Gradients panel Window>Gradients (Only in Photoshop 2020 or newer)
Click on the panel menu and choose Legacy Gradients
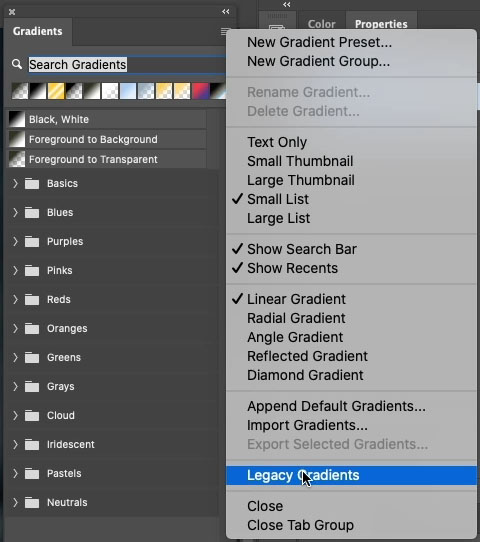
You will see a whole library of gradients load up.

Go back to your gradient Map layer and click on the properties panel.
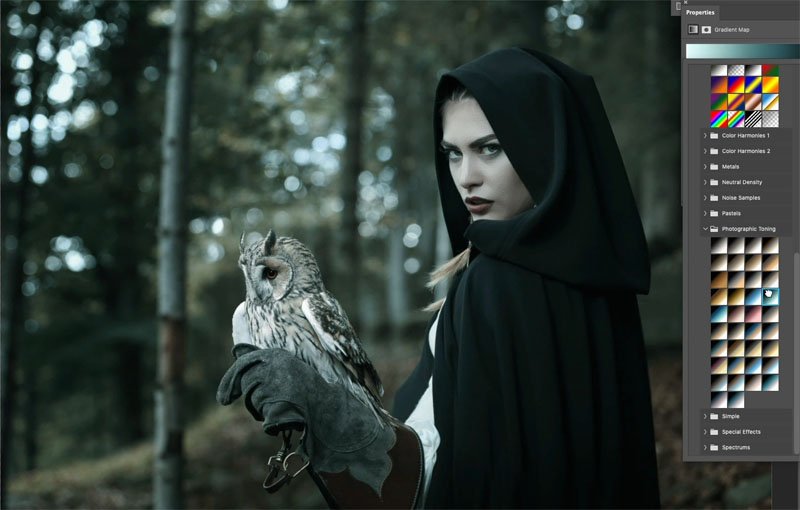
All these Gradients will now be visible in the menu. Scroll down to the Photographic Toning ones, these are really good. They have been in Photoshop forever, but so few people know about them. You are now one of those lucky people (Aren’t you glad you came to PhotoshopCAFE?)
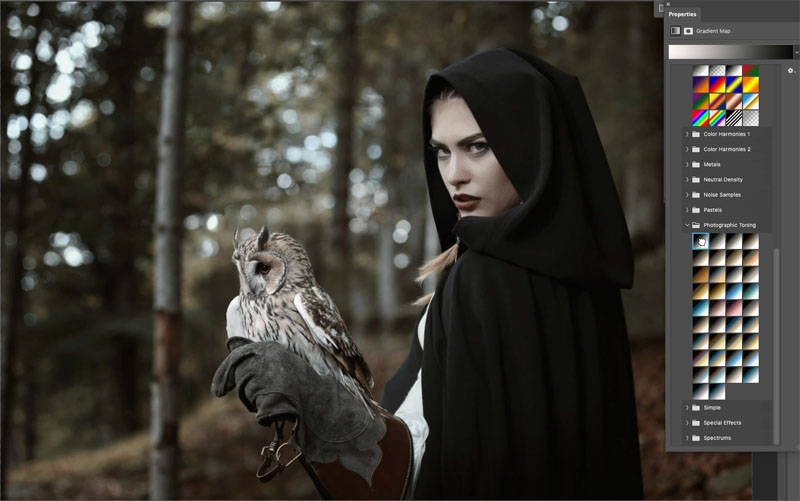
Try clicking other options to instantly update your image.
HOW A GRADIENT MAP IS DIFFERENT THAN A GRADIENT OVERLAY
Here you can see a red to green gradient is over the image. Its position based and has no regard to tone.

Here, the green to red gradient is applied as a gradient map. The reds to Shadows and greens to highlights.

If you choose the Reverse option is will flip the gradient map
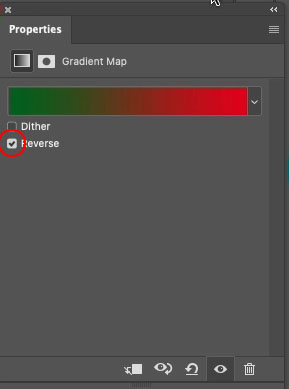
Now greens are in the shadows and reds in the highlights.

I hope you found this tutorial enlightening.
You May Also Like

LEARN HDR IN PHOTOSHOP, COLIN’S HDR PHOTOGRAPHY TUTORIAL

CHANGE DAY TO NIGHT IN CAMERA RAW, LIGHTING PHOTOS IN PHOTOSHOP.

